

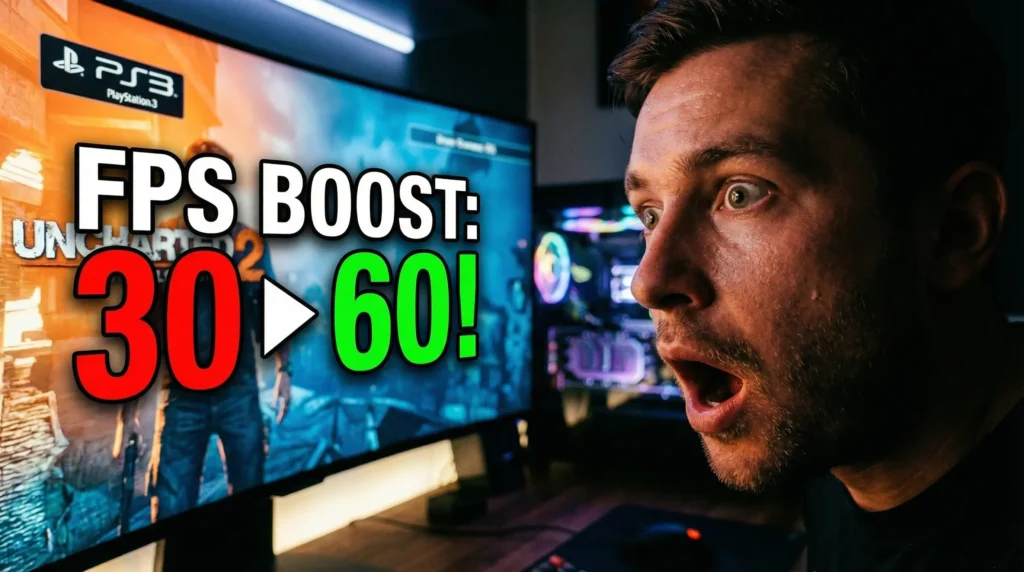
If you follow the world of gaming emulation, your feeds have likely exploded this week with news of a massive RPCS3 Cell CPU breakthrough. The development team behind the world’s most popular PlayStation 3 emulator recently announced an update that completely alters how the software handles the PS3’s notoriously complicated processor, resulting in across-the-board performance gains for virtually all games.
With search interest spiking over 200% as PC gamers rush to update their emulators, it is the perfect time to look back at the chaotic history of this hardware. Why is the PS3 still making headlines in 2026? Why is it so incredibly difficult to emulate?
The answer lies in the hardware itself. The PlayStation 3’s Cell processor was extremely powerful but very difficult to use. To understand why this recent emulator update is such a monumental achievement, we have to understand the nightmare that game developers faced nearly two decades ago.
The Architecture: Why the Cell CPU Was a Nightmare
When Sony launched the PlayStation 3, they didn’t just build a console; they attempted to reinvent how computer processors worked.
Unlike normal CPUs found in gaming PCs or the competing Xbox 360—which relied on straightforward, symmetrical cores—the Cell Broadband Engine utilized a highly asymmetrical design. It featured one main core called the Power Processing Element (PPE) designed for general tasks, and a cluster of several smaller, specialized co-processors called Synergistic Processing Elements (SPEs or SPUs).
In theory, this was an absolute powerhouse. In practice, it required incredibly complex, low-level programming. Developers could not simply write standard code and let the CPU figure it out. They had to manually assign and manage the data flowing between the main PPE and the smaller SPEs. Because of this steep learning curve, early PS3 games performed noticeably worse than their Xbox 360 counterparts, despite the Sony hardware being technically stronger on paper.
The Naughty Dog Era: Mastering Parallel Processing
For the first few years of the PS3’s life cycle, the hardware was heavily criticized. However, over time, first-party developers learned how to properly use the Cell’s unique architecture.
By breaking heavy tasks into smaller parallel workloads and efficiently feeding them into the SPEs, developers were able to unlock much higher performance and unprecedented graphics quality. Instead of letting the graphics card do all the heavy lifting, the Cell CPU was put to work calculating advanced physics, complex lighting engines, and real-time audio decompression.
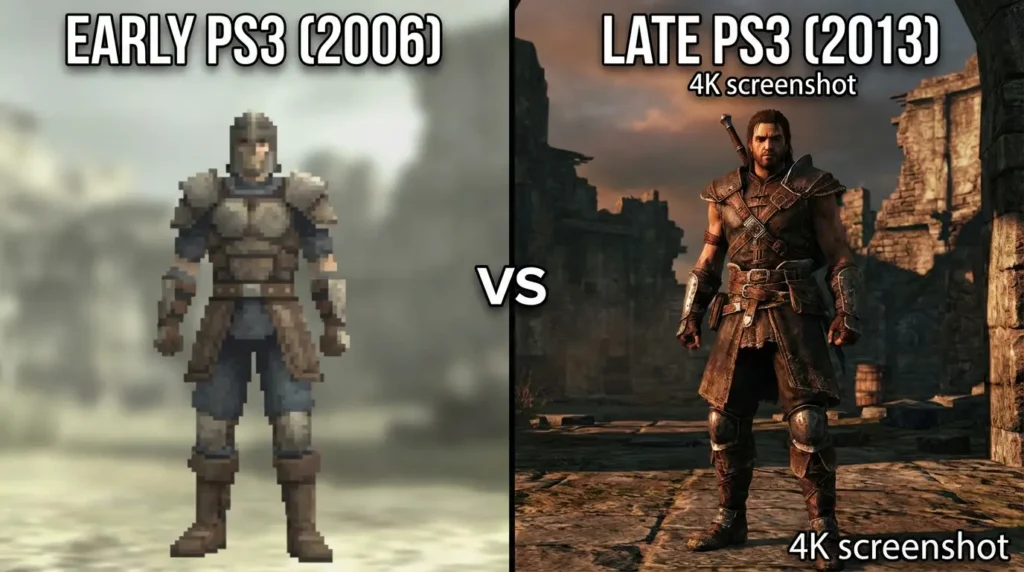
Studios like Naughty Dog led this breakthrough by building custom, proprietary game engines designed specifically from the ground up for the Cell CPU. As their understanding improved, the visual leap between their games was staggering. If you look at the first Uncharted game and compare it to The Last of Us a few years later, it showed massive graphical improvements—almost like playing on a completely new generation of console, despite running on the exact same hardware.
This original “breakthrough” was essentially the gaming industry mastering parallel processing and the Cell’s unique design, turning a famously difficult system into an absolute powerhouse. However, it came with massive downsides: developing games for the PS3 required much longer development times, significantly higher costs, and specialized engineering teams.
The 2026 RPCS3 Emulator Update Explained
Fast forward to today. The exact same complex architecture that gave developers headaches in 2006 has given emulator creators headaches for the last decade. Translating the bizarre, parallel instructions of the Cell’s SPEs into standard code that a modern AMD or Intel PC processor can understand requires massive computational power.
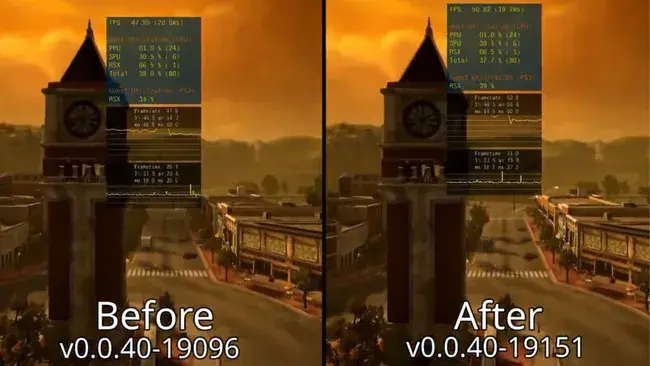
This is why the recent RPCS3 update is making waves. Lead contributor “Elad” discovered previously unrecognized SPU usage patterns buried within the PS3’s code. By recognizing these patterns, the RPCS3 software can now generate significantly more efficient native PC code.
What Does This Mean for PC Gamers?
- Higher Framerates: SPU-intensive games, such as the 2012 reboot of Twisted Metal, are seeing average FPS improvements of 5% to 7%.
- Less Stuttering: Because the code translation is more efficient, there are fewer CPU bottlenecks, meaning smoother frame pacing and fewer gameplay spikes.
- Low-End PC Support: This is not just an update for people with $2,000 gaming rigs. Because the emulator is running more efficiently, even gamers on older, budget CPUs (like dual-core Athlons) are reporting improved audio rendering and better gameplay.
Pro-Guide: How to Increase Your Game’s Resolution in RPCS3
Now that the emulator is running smoother than ever thanks to the Cell CPU breakthrough, you might find that you have some extra PC horsepower to spare.
While the PS3 natively output most of its games at 720p, modern PCs can push those classic textures to incredible new heights. If you want to make games like Demon’s Souls or God of War III look like modern remasters, you need to utilize the internal resolution scaler.
Follow this exact step-by-step process to properly increase your game’s resolution in RPCS3 without breaking the game’s internal rendering logic:
Step 1: Open the Custom Menu Launch the RPCS3 application. Right-click on the specific game you want to enhance in your game list, and from the context menu, select Change Custom Configuration. (Note: It is highly recommended to do this per-game rather than globally, as some games require different settings).
Step 2: Navigate to the GPU Settings At the top of the configuration window, select the GPU tab. This is where all graphical processing options are housed.
Step 3: The Golden Rule of 720p Look for the setting labeled “Default Resolution.” Warning: Do not change the default resolution option. Leave it strictly on 720p (1280×720). Changing this base setting breaks the internal logic, user interface, and visual effects of almost all PS3 games, leading to graphical glitches.
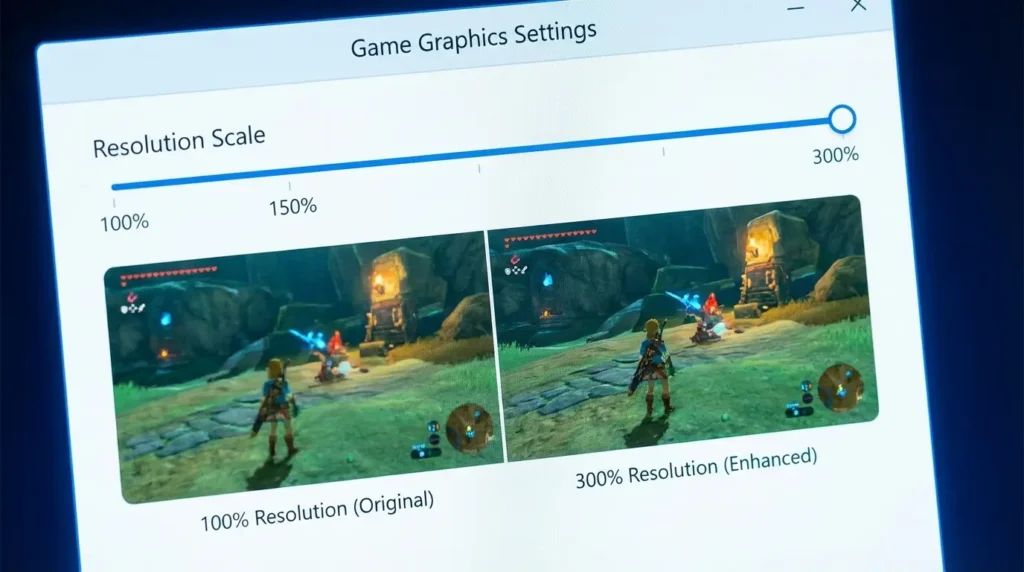
Step 4: Adjust the Resolution Scale Instead of changing the base resolution, move your cursor down to the Resolution Scale option. By increasing this percentage, the emulator forces your PC’s graphics card to render the 3D models at a higher fidelity before outputting them to your screen.
- Increase the scale to 150% to render the game at crisp 1080p.
- Increase the scale to 300% to render the game in stunning 4K.
Step 5: Save and Boot Once you have dialed in your desired percentage based on your monitor’s capabilities, click on Save Custom Configuration at the bottom of the window to apply the changes. Finally, right-click on your game one last time and select Boot with Custom Configuration. Enjoy your beautifully upscaled classic!
The Legacy of the PlayStation 3
Watching the emulation community continue to crack the codes of old hardware is a testament to the passion of PC gamers and software engineers.
The history of the PS3 is a fascinating case study in computer science. The Cell CPU wasn’t weak—it was simply ahead of its time and incredibly hard to use. Once original developers, and later the brilliant emulation engineers behind RPCS3, learned to handle it properly, its true power became undeniably clear.
Have you tested the latest RPCS3 update yet? Let us know in the comments which classic PS3 game you are currently upscaling on your PC!
")
")

")


No Comment! Be the first one.